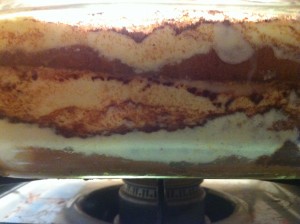
This has nothing to do with the rest of the post, BUT, I was rather shocked the other day when I took out the fennel bulb I had halved the other day to find this:
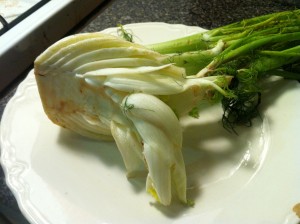
Who knew it would keep growing like that?!?! I kinda like it. And it still made a delicious juice.
So I was indulging myself in a tiramisu ice cream shake the other day while walking around Provincetown. I loved it!! So naturally, on the car ride back, I was busy googling recipes to make Tiramisu myself. Sadly, I found little that was super exciting on that car trip (perhaps because of the limitation of the smart phone, smart as it may be). I didn’t want to use lady fingers that were bought from a store. Nor did I want to make lady fingers. Not only am I creeped out by the fact they’re called “lady fingers”, but I’m not great at piping (though I did take cake decorating courses with my mom in the Ames store when I was growing up). I wanted a recipe for a cake that would be lady finger like but in cake form. Thankfully, someone else on the interwebs was also interested in making tiramisu as a cake. Thank you, Nick from macheesmo.com!!!!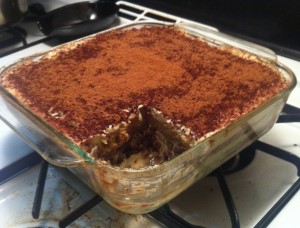
As it turns out, I should have been looking for a “Ladyfingers Genoise” recipe this whole time. Who knew?? Apparently Nick did. He links to this video to help with the making of the genoise. In my classic fashion, I watched the video and hurriedly typed the recipe and instructions down while Julia and Flo whip up some delicious treats. And then I went to bed. About 4 days LATER, I decided I had time to try out this recipe for myself… but of course did NOT re-watch the video. no no no. Such a thing would have been clever, smart, even logical and apparently not my style. I just started in, following the notes I had taken down as I went. I gotta say, I don’t think it was too too terrible! The recipe below reflects what I did and hopefully what they say to do in the video.
I gotta say, it’s recipes like these that make me wish I had an electric mixer. Thankfully I have an egg beater, so the whole whipping till the batter creates ribbons wasn’t too terrible. All in all, the whipping took me about 12 minutes. I was also scared of the folding in of the flour. In the past, I have had some bad experiences with this… where the folding somehow turns into vigorous stirring… and then the batter is no longer light and fluffy. Not sure why that would be… ?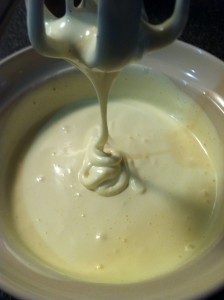
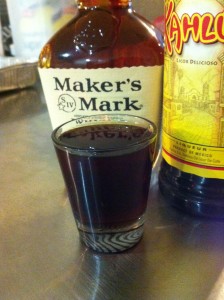
I think my favorite part was the assembly. Who doesn’t like to soak cake with coffee and booze? Because the scientist in me wanted to get the measurements perfect for the soaking liquid, I made myself a shot of what I hoped would be the appropriate ratios of coffee to alcohol. And this of course necessitated drinking it to check. Life is hard.
 I admit, my construction at the end was a bit rushed, even though I just said it was my favorite part. I had to make sure that I was on time for Margarita Monday’s with my lady friend, Tkit.
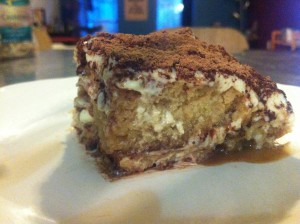
To conclude and get to the recipe, this was an overall success I would say. The genoise came out nice, the assembly is super easy, and the result has delicious amounts of cream and alcohol. WOOT!
Tipsy Tiramisu
adapted from macheesmo.com
Ladyfingers Genoise:
2 eggs
4 egg yolks
1/2 cup + 1 tbsp sugar
1 1/4 cup flour
1 tsp vanilla
1 tsp salt
3 tbst melted butter (not too warm)
Filling:
1 cups very strong coffee
1/3 cup Bourbon
1/6 cup Khalua
1 cup heavy cream
1 pound mascarpone cheese (16 oz) @ room temperature
1 tsp vanilla extract
1 cup powdered sugar
Cinnamon (for dusting)
Cocoa powder (for dusting)
Making the Genoise:
Grease a 9×9 pan and line with parchment. Preheat oven to 350 degrees.
Sift flour, 1 tbsp sugar and salt together. Set aside (According to Flo, the sugar and salt allow the flour not to clump together so much) .
Whisk eggs and yolks together with remaining sugar to combine. Then begin whipping the eggs with your eggbeater or mixer. Keep whipping. Then whip some more. You want your mixture to become nearly white, and about tripled in volume. It should look something like softly whipped cream (won’t hold peaks), and when the beater is drawn out, the batter will hold a ribbon texture for several seconds (see above photo).
Once you have achieved this ribbon state, add in the vanilla and beat some more. I did about 2 more minutes of beating. The ribbon should still last on top when done.
Add about a third of the flour mixture, gently, to the egg mixture, and using a spatula, gently fold in the flour. This was easier than I thought it would be, once I got the hang of it. Then add the second third, and then the final third, completely folding in the flour after each addition. Your batter should be denser now, but not significantly decreased in volume. Add about 1 cup of your flour/egg batter to the melted butter and gently fold in. I found this rather frustrating to do, but perhaps that’s because my bowl was very small, so my folding movements were constrained. Once you have sufficiently folded the butter in, add this mixture to the rest of the flour/egg mixture and gently fold in. Again, be gentle. You don’t want to deflate your batter!!
Once the butter has been successfully folded in, turn the batter into the prepared 9×9 cake pan. You can gently spread the batter to the edges, but the more you manipulate it, the more you lose your bubbles. I found I didn’t actually need to do much spreading. Bake for 20-25 minutes, or until the top of the cake springs back. I baked mine for 28 minutes, and perhaps could have gone for 30 minutes.
Allow the cake to cool in pan for about 15-20 minutes and then turn out onto wire rack and let cool completely. (I cheated here and put it in the fridge because of time constraints…aka margarita night)
Preparing the filling:
Mix coffee, bourbon, and Kahlua in a bowl. Go ahead and taste it if you wish and adjust to the coffee booze ratio you prefer.
Combine the mascarpone cheese and heavy cream in a large bowl and whip with eggbeater or mixer. CAREFUL HERE!!! Don’t over whip or your mixture will start to separate. Whip until mixture holds soft peaks. Add in vanilla and confectioners sugar and whip until just combined (slightly stiff peaks?).
Assembly:
I cut my cake into 3 layers. Perhaps 2 layers would have been better. The video shows you how to cut your cake with a long serrated knife.
Place first layer into pan, cut side up. Using a pastry brush, brush on the coffee/booze mixture. Saturate to your desired level (I used alot). Add a layer of your mascrapone filling (I used 1/3 of the filling because of 3 layers. Use half if you’re doing 2 layers). Gently sift a layer of coco and cinnamon on top of the filling. I estimate I did about 6 teaspoons coco to 2 teaspoons cinnamon (3:1 ratio). Then place your next cake layer on and repeat soaking, filling and powdering until all layers are done.
And now you’re done! I recommend chilling before serving, but that depends on whether you can wait that long before trying your creation.

Leave a Reply