I SWEAR I’M NOT VEGAN!!!!
I swear it!!!
But once again I have managed to make another vegan delight.
It just happens this way.
I swear!
So it was my original goal to post once a week. Sadly, I have already broken that goal within my first few weeks of doing this.
Sigh.
But I’ve been a bit busy. There was an exam to study for. And then there were meetings that I had to prepare for (which went very well and I’m feeling… better about grad school). And then there were Gotham Girl Roller Derby Jeerleader practices. Sometimes there’s just not enough time in the week to bake. A sad fact we must accept and then move on with our lives.
OH!! But more important than all of that, there was the dropping of Cher’s new album Closer To The Truth which I have been listening to on repeat for the past week or so. And then there was Brit Brit’s new video to get excited for! I have to admit, the song is rather club-tastic, but it get’s me going on the cardio machine. In fact, I bet it’s no so secretly being played into the ears of most of those gym goers in NYC…. Don’t be afraid to admit it, Chelsea boys. Enjoy the video:
But enough of this pop culture. Back to the baking!! I actually made these cookies for a “how to apply to grad school” meeting that I’m going to. One of the grad students who will be at the meeting telling us how to make it all happen is vegan (and also a member of the lab I work at), so I thought I should say “ThankYouForPassingOnAllYourValuableKnowledge” by making some baked goods that he could eat. Seems only fair, no?
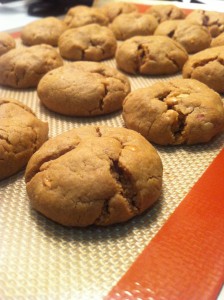
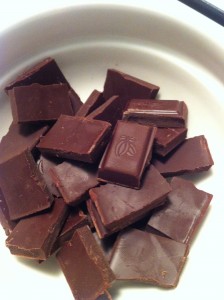 I’ve made this recipe in various forms many a time. This time, I added more flour than usual so the cookies would hold their shape a touch more, allowing me to throw in a chocolatey surprise into the center. This idea actually came from a reversed scenario, where I made a chocolate cookie and inserted a ball of peanut butter into the center and baked. Those guys baked quite nicely, and looked like flying saucers or chocolate fried eggs because the dough just melted and baked over the ball of PB. Though adorable, the shape made them a bit annoying to package and carry around. So I tried to make these cookies a bit more “baker on the move” friendly.
YIKES!!!! I was just typing my ingredients below and realized that in my batch of cookies, I completely forgot to add 1 cup of sugar. I only added brown sugar… WHOOOOOOPS! But they cookies taste fine nevertheless. The sugar may have been nice to counteract the super dark chocolate chunks in the middle, but whatever…. you can add the sugar if you wish.
Vegan Peanut Butter Cookies with Chocolate Centers
Yields ~40 cookies
18 oz Crunch Peanut Butter (or smooth, but I like crunchy…)
1 tablespoon baking soda
1/2 cup apple sauce
1/2 cup brown sugar
1 1/4 cup flour
2 teaspoon vanilla extract
~4 1/2 ounces vegan dark chocolate, broken into bite sized pieces
1. Preheat oven to 350 degrees. Line baking sheet with parchment paper.
2. Place all the ingredients into a large bowl and combine completely.
3. WASH YOUR HANDS COMPLETELY!
4. Begin rolling the cookie dough into ping-pong sized balls. Flatten the ball, place a piece of chocolate in the center, and then roll the dough around the chocolate piece. Place on baking sheet, with about 1 inch between balls. Because we added a fair amount of flour, they don’t spread out much.
5. Bake for 10-12 minutes, depending on how soft you like your cookies. I like them fairly gooey, so I compromised and baked them for 11 minutes. Once baked to desired softness, take baking sheet and hold 2-3 inches above counter. Drop sheet onto counter. Repeat 1-2 more times. This gets out air bubbles trapped inside the cookies, allowing your cookies to remain soft and gooey instead of getting crunchy as they cool. Allow cookies to cool for ~5 minutes and then move to cooling rack to completely cool.
6. ENJOY!
Cheesy and Spicy
Before I forget, I would like to thank my dad for pointing out that “baking with Unicorns” can be re-scrambled to “Scrub A Thinking Wino.” Not only do I find that to be a hilarious image, but also rather appropriate considering how much I love my wines. In fact, this blog was almost named “confections of an alcoholic” but then realized I’m not actually an alcoholic, so didn’t want anyone getting any ideas.
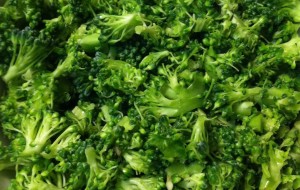 Anywho, this past summer I went on a small scone baking binge. I was originally inspired by a post from The Moon In My Kitchen where she posted a delicious recipe for blueberry scones. I made those, varying it a bit and adding an icing. And then I made some peanut butter chocolate chip ones, then some orange chocolate chip ones and then some…. I made tons of scones. I found them quick and satisfying to make. But the whole time I was on this baking binge, I really wanted to make a savory scone, but never remembered to buy the ingredients (generally I was making these scones at night after about 4-5 hours of GRE studying, so my brain was a bit fried). The other day, I remembered my binge, and quickly flipped through various recipes for scones, gathering a general “scone formula” of flour, baking powder, salt, sugar, butter, milk and flavor. From there, I pieced together my savory scone recipe. A Cheesy, Jalapeno, Broccoli Scone.
I have to admit that these babies were a hit. At least, they seemed to be with my roommates and those who work in the psychology lab I’m an RA at. HOOOOOOORAY! I personally loved them. Hint of jalapeno so that you get a small kick in the mouth, but the cheese helps to calm the burn. And the broccoli adds great texture and delicious flavor. I was rather sad that I only made 8 scones, but I suppose I could always make more….
Before I get to the actual recipe, I should note that when I was making these, I was all sorts of in the mood to be precise and measure things out perfectly. I have a small kitchen scale that goes from ounces to grams and seems to work pretty well…. And it did… for half of the measuring and then the batteries died. So you will notice that the recipe is in several systems of measurement. I apologize for that, but…. it’s all I got for you now. If you need to convert to a single system, google it.
Cheesy, Jalapeno, Broccoli Scones
(original recipe)
375 grams (3 cups) Flour
1 1/2 Tablespoons Sugar
1/2 Teaspoon salt
3/4 teaspoon Baking Powder
1 stick of Butter (extra cold)
~0.6 lbs Extra Sharp Cheddar Cheese
~.25 lbs Asiago Cheese
35 grams diced Jalapenos (~two 2″ peppers)
75 grams Broccoli Florets
1 cup Half and Half (plus extra for brushing)
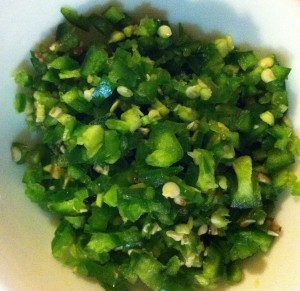
Dice the jalapenos and broccoli and set aside.
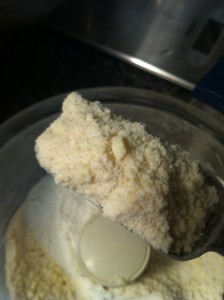
Sift flour, baking powder, sugar and salt in a large bowl (I’ve really been enjoying sifting my dry ingredients together lately, even though it creates more dishes). Take about half the flour mixture and place in a food processor. Cut the cold stick of butter into 4-6 pieces and place into food processor as well. Pulse the processor until the mixture resembles a rather course mixture (see picture).
Combine the butter/flour mixture with rest of flour mixture. Grate the cheese (watch your fingers) and combine with flour mixture. The flour should coat the cheese bits and help to separate them so they’re not all clumped together. Toss the jalapenos and broccoli in with the flour mixture, distributing broccoli and jalapenos throughout the mixture as evenly as possible.
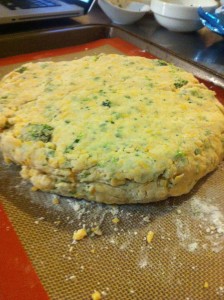 Add 1 cup of half and half to flour mixture and combine, using wooden spoon. The dough should be somewhat sticky, but not too sticky. If it’s completely sticking to the sides, add a bit more flour. If it’s completely dry, add just a touch more half and half. Turn dough onto prepared floured surface. I like to put a no-stick silpat sheet on an 18×12 jellyroll pan. Kneed your dough for 2-3 minutes, adding a bit of flour if needed such that dough sticks together, but is not sticking to everything. Then shape into a sphere and flatten out till about 1″thick.
Slice the round of dough into 8 pieces (like a pie) or however you wish to form your scones. Evenly spread the scones out on pan (they don’t spread out much except for the cheese part melting). Brush the tops of the scones with a bit of half and half and then place in oven.
Bake for 26 minutes or until toothpick comes out slightly or completely clean. I went with slightly, giving me a much more moist scone, more biscuit like. Allow the scones to cool on pan for about 5 minutes and then transfer to wire rack to cool completely. I served them as is, but if you feel you need a touch more butter, salt, and/or pepper, go for it!

Chocolate Vegan Cake Catastrophe
The other night I woke from an amazing, heart warming dream. I was hanging out with Cher in her apartment with a friend from high school, and we were having a grand old time. Cher even started singing for us, though I have no idea what the song was. Best part was that Cher’s apartment was actually attached to a mall…? It was a rough rest of the day as I trudged through the reality that Cher and I are not best friends. WHY!?!?! If you haven’t seen Cher’s new video, check it out. Her hair is amazing! Woman’s World
This week I have also been reading alot of research papers on motor skill learning. On the one hand, people are doing some really great stuff out there that I want to get involved in. On the other hand, they seem to be doing it at top universities that I’m not sure how I’m going to get into. Can I bake them cakes as part of my application? Perhaps a boozy confection that will put them into a perfect mind set to admit me? Please?
Sigh.
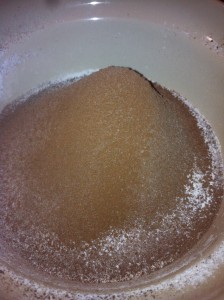
Dune of sifted ingredients
Anyway, onto this vegan cake that I conjured up. I say it was a catastrophe, but perhaps I’m being a bit harsh. It was simply a baking adventure (good thing this blog isn’t called “Baking with Unicorns: a how to on all things baking”). Everything started out quite nicely. I sifted ingredients together (I thought it looked rather like a sand dune), which I normally never do because I’m lazy. and the batter was looking quite nice, but once the batter was in the pan, things stopped going so well. The recipe calls for 3 TABLESPOONS of baking powder, which in my head meant major bubbling and rising, but that didn’t fully translate until it was almost too late.
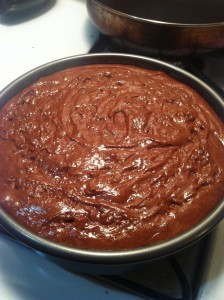
1 minute before I got another pan
I had to wait for my oven to heat up, so after the batter was in the pan, I started to clean up. When I looked over a second later, the batter had risen up to nearly spilling out of the pan! I had to quickly prep a second pan, and awkwardly scoop half of the batter into the second pan. I was a bit scared that this would kill all the light fluffly bubbling of the batter, but in the end, I think it was okay. There was enough baking powder to keep the reaction going. YIKES!
The cake came out fine, though I think it was a bit lacking in flavor and it was SUPER crumbly, most likely because there was no egg or something to bind everything together. The ‘fudge’ frosting was almost a success. I think it certainly has more flavor than the cake, but the recipe made a deceivingly small amount of fudge. I was supposed to have enough to make 1 layer to stick the 2 layers together with and to put into a piping bag and pipe on a pretty top to the cake. I could barely spread a thin layer of the stuff in the middle and the top.
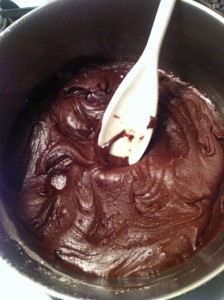
fudge!
Now, i admit my measuring skills for the fudge were lacking, but I OVER did it with the ingredient amounts and still came out with less than expected. GRUMPH!
But all my grumbling aside, I think that overall, the cake wasn’t the worst. Again, I thought it lacked in flavor, but when I took it to my lab and people tried it, they thought it was great, especially for a vegan cake(there are a couple of resident vegans in my lab, so I’ll take their praise as being well informed). I personally think it’s good when the fudge and cake are eaten at the same time, but neither one can stand alone. But that’s just my personal opinion (as is this entire blog….). Here’s the recipe:
Vegan Chocolate Cake
modified from The Ultimate Encyclopedia of Chocolate
The Cake:
2 1/2 cups flour
1/2 cup cocoa powder
3 tablespoons baking powder
1 1/4 cups sugar
1 teaspoon vanilla
9 tablespoons sunflower oil
The Fudge:
1/4 cup vegan margarine (I used earth balance)
3 tablespoons water
2- 2 1/2 cups confectioners’ sugar
~4 tablespoons cocoa powder
Preheat oven to 325 degrees.
Prep two 9″ round pans (I just used non stick pans and lined with parchment on the bottom).
Sift the flour, cocoa, baking powder, and sugar together in a large bowl. Add vanilla and sunflower oil and mix completely. The batter should start to be bubbly/airy. This is because of the crazy amount of baking powder. Divide batter between the two pans and bake for ~25-30 minutes or until a toothpick comes out clean. (This time is a total estimation. The original recipe was for 48 minutes, but the cake was NOT divided into 2 pans like I did it here).
Allow to cool in the pan for about 10 minutes, then turn out onto wire racks and allow to cool completely.
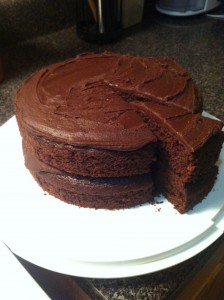 To prep the fudge, melt margarine with the water in a saucepan. Remove from heat and add in the confectioners’ sugar and cocoa powder(I sifted the sugar and cocoa powder to avoid lumps). Add more water if the fudge seems like it’s too thick. Spread half the fudge onto top one of the cake layers. Place second layer on top and spread rest of the fudge on top. DONE! There won’t be enough fudge for the sides, but I think that’s okay. The fudge is rather intense and may have been too intense if there were more of it on the cake.
ENJOY!
Days of Birth

I would bake you a cake, but then would have to figure out a way to get it to you, and to the extend of my knowledge, your youngest daughter has not invented a transporter yet. So this will have to suffice. Just know that it is all her fault that you don’t have a ginger chocolate cake sitting in front of you right now.


